In previous blog posts I have given you suggestions for strips, squares and triangles. If you have sorted your scraps, you have probably found fabric chunks that do not fit into any of those categories, and you might be wondering what to do with those.
An easy solution is to create your own fabric from them by sewing them together. You can combine the colors randomly or sort so that you are only using neutrals, only greens, only reds, etc. The most important "rule" when creating your scrappy fabric is to make sure you are joining STRAIGHT edges. This will insure that your finished fabric will lie nice and flat. So, once the fabric chunks have been pressed, trim a straight edge on each scrap and pair up the scraps according to the length of the straight edge. Stitch with a 1/4" seam and press the seam allowance to one side. Trim a straight edge on this pair of scraps and add another scrap to it. Continue to add pieces in this way until your new fabric is large enough to cut your desired shape from it.
Leftover pieced units from previous quilt projects can be worked into this fabric in the same way as other fabric scraps. I like to sort my scraps into "large" and "small" before beginning to create my fabric. I piece the small scraps together when I know that I will be making small blocks. I piece the larger scraps together when I know that I will be making large blocks.
For more detailed instructions on making scrappy pieced fabric, check the "How-To" tab on my website: http://carolsscrapquilts.webs.com.
Have fun creating your own unique fabric!
Wednesday, April 23, 2014
Thursday, April 10, 2014
Use Your Scraps, Part 6

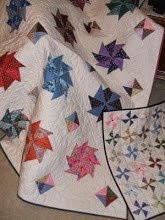
Many quilt projects result in half-square triangles being left behind. Once you have a collection of them, turn them into squares.
Cut a strip of background fabric that is wider than your largest triangle is tall. Place the half square triangles along the edge of the strip--raw edges of long side of the triangle matching to the raw edge of the strip. Stitch them in place.

Cut the triangles apart, leaving extra fabric around each one. Press the seam toward the dark fabric. Using a small square ruler, align the seam with the 45 degree line on the ruler to square up each triangle square.

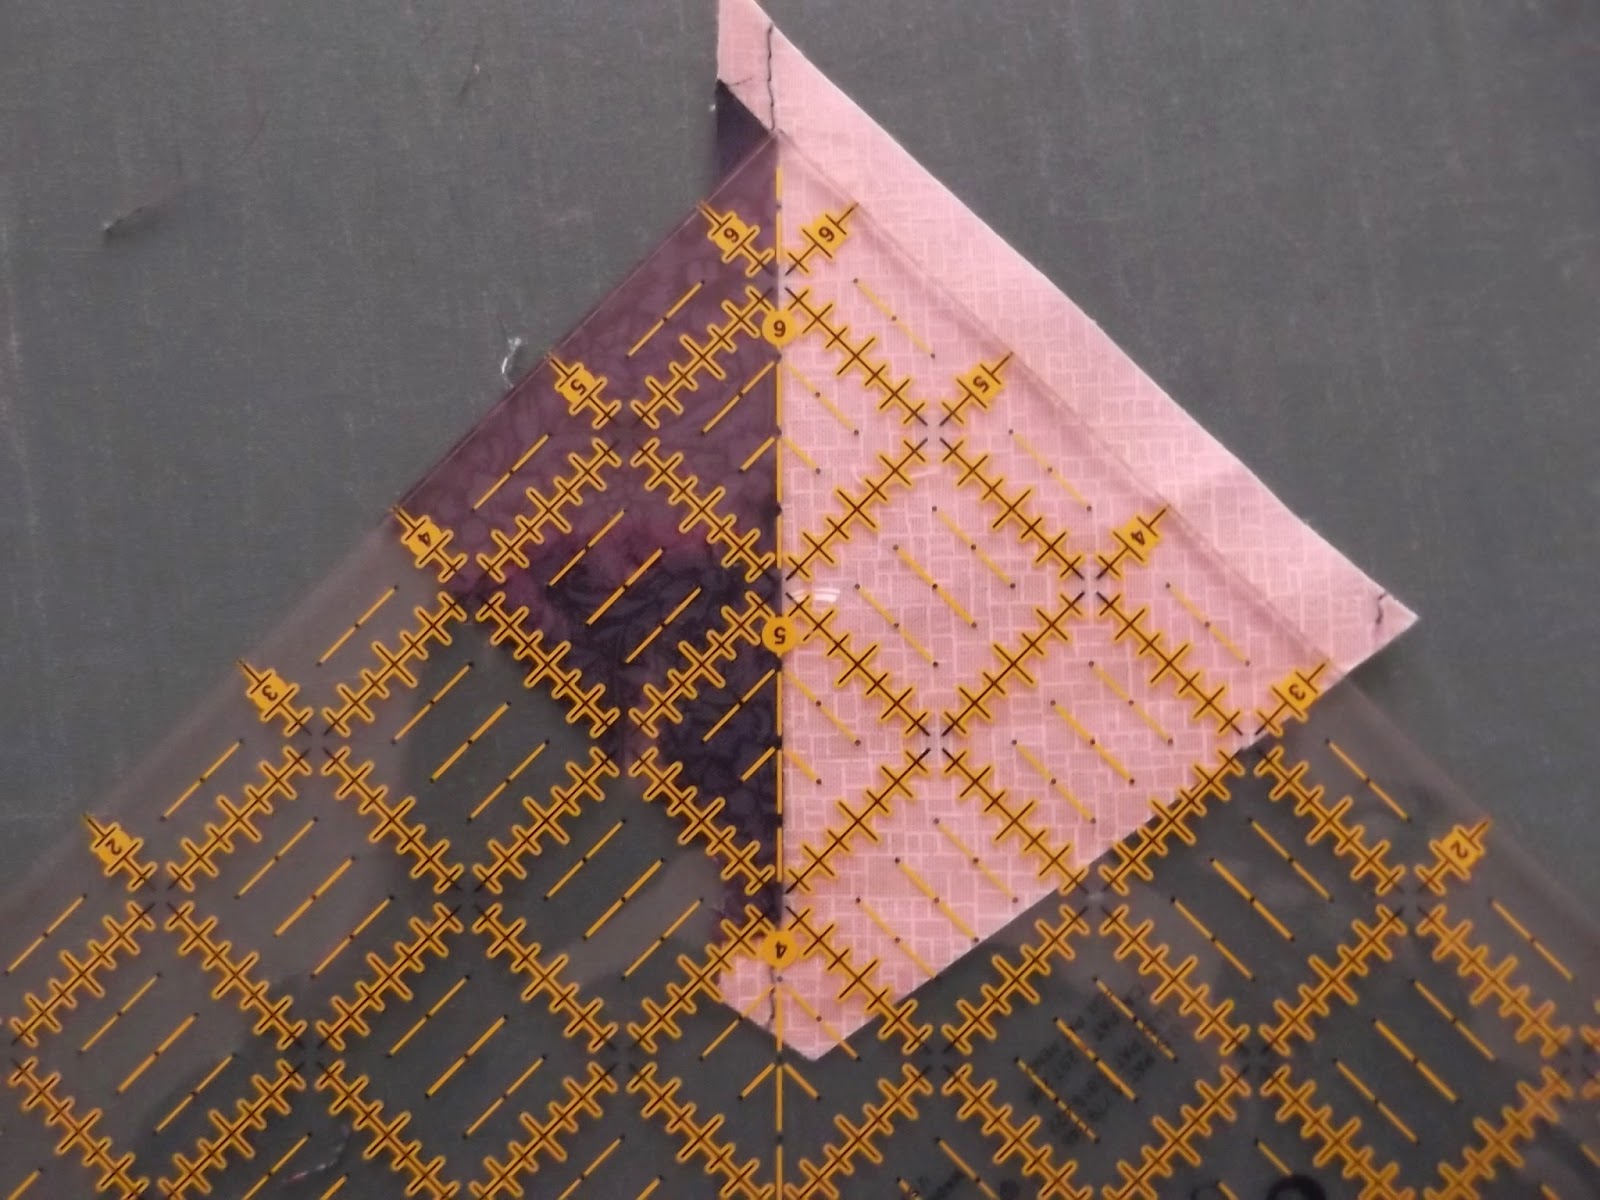 Once they are all squared up, the squares can be trimmed down to the size needed for your project. Be careful of the edges of the background fabric. They are now on the bias, so handle the finished squares carefully.
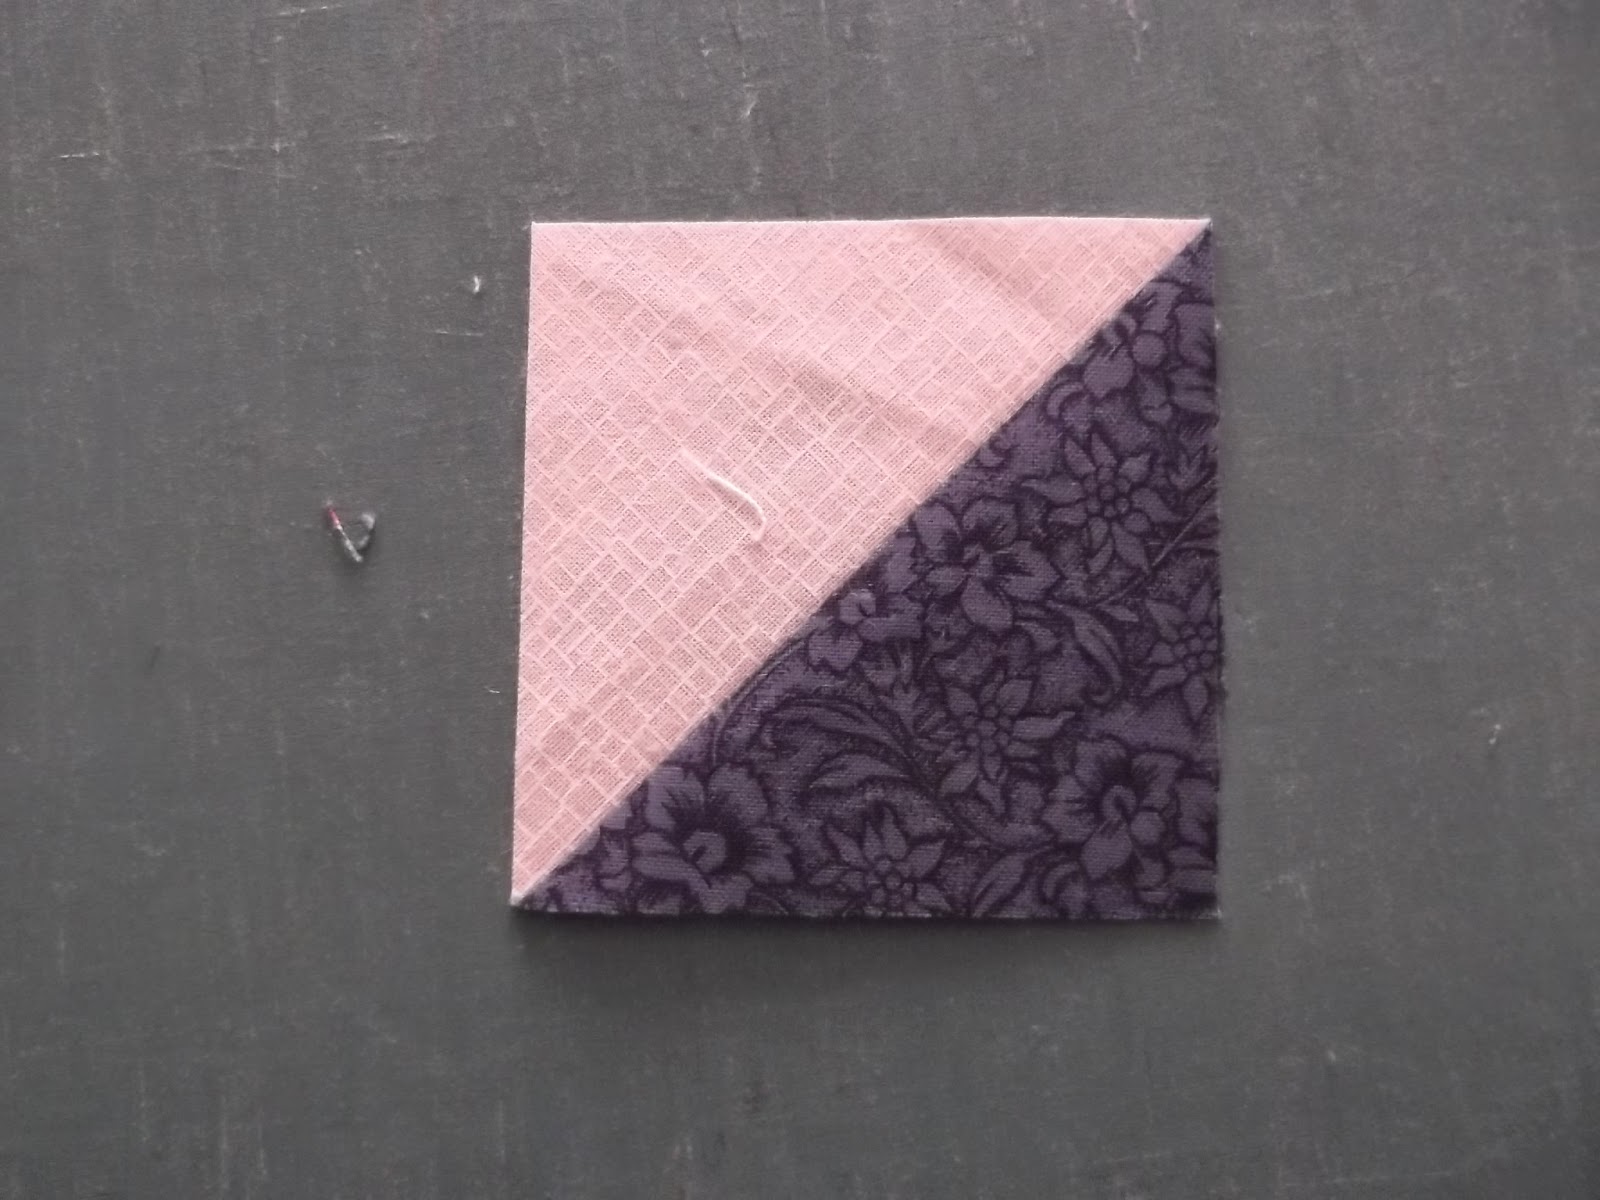

(To end up with edges that are not on the bias, cut squares of background fabric slightly larger than the short side of your half square triangle. On the wrong side of the fabric, draw the diagonal of the square. Match the long side of the half-square triangle to the drawn line. Stitch the triangle in place, using the drawn line as a guide for your 1/4" seam. Add another triangle to the other half of the square. Cut apart on the drawn line. Press seam allowance toward the dark and square up as above.)
Great scrappy quilts can be made from these new 1/2 square triangles--pinwheels are fun. Be creative and play with the design possibilities.
Wednesday, April 2, 2014
Use Your Scraps, Part 5
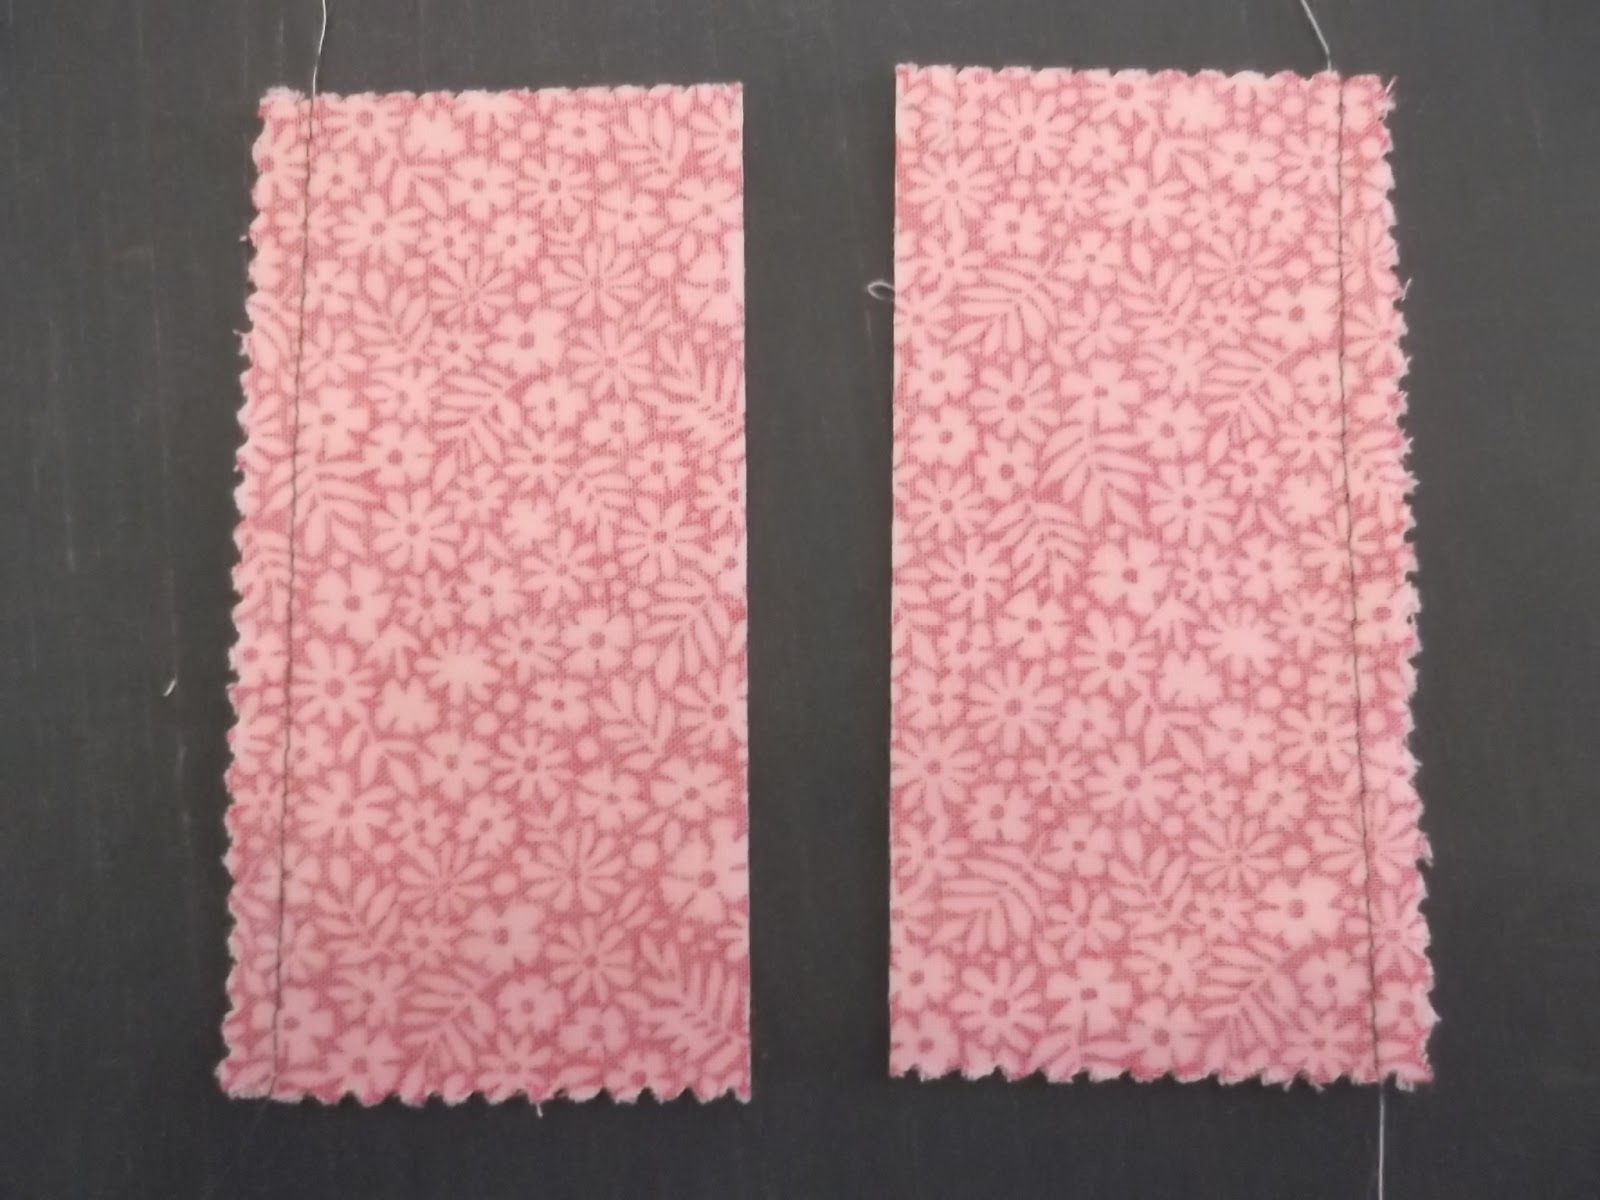
Here's another idea for using your charm squares--a fun way to make 4-patch squares. Right sides together, pair up a print charm square with a solid square of the same size. Using a 1/4" seam allowance, stitch the squares together on opposite sides. Then cut the sewn squares apart through the center (the cut will be parallel to the stitched edges).

 Press the seam allowances toward the print fabric. Right sides together, place one pressed square on top of the other, with the print rectangle on top of the plain rectangle below and the plain rectangle on top of the print rectangle below. The center seams should butt nicely to each other. Pin in place. Using a 1/4" seam allowance, stitch along the opposite outer edges--this stitching will be perpendicular to the center seams.

 Again, cut the squares apart through the center--parallel to the seams you just sewed. Open out and press. You now have two 4-patch squares! Square up as necessary.

 I think this technique is perfect for those charm squares with pinked edges-- which I find so hard to work with! Because of the way these 4-patch blocks are constructed, those pinked edges disappear!
Try this...you will like it! :)
Try this...you will like it! :)
Subscribe to:
Posts (Atom)