Showing posts with label scrap quilt patterns. Show all posts

Monday, April 17, 2023

Not Quite Log Cabin

 As you may know by now, I am always on the lookout for quilt designs that will work to make lap quilts and use up my fabric scraps.

At a retreat that I attended last year, there was a basket of $1 patterns.  Looking through it, I found "Garden Window" by Bits 'n Pieces.  The description said "a pieced quilt with applique flowers--make it with quilters quarters".  The background on which the flowers were placed appeared to be a kind of Log Cabin design.

One of my scrap bins contained a stack of "somewhat" coordinated larger pieces of fabric, several of which were wide strips.  These fabrics were perfect for this pattern!

The instructions said to make strip sets of two different sizes and cut those into chunks for the block centers.  The centers were then surrounded by four strips, all cut to the same size.

As I was making the various block parts, I made sure to mix up the placement of the fabrics.  Piecing the blocks was quick and fun.  

When the blocks were set together, no matter which way they were turned, there were no seams to match up!  Easy!!  


The "somewhat" coordinated fabrics are repeated enough so that the resulting quilt top is scrappy, but not too busy (at least to my eye).  Twenty blocks, set 4 x 5, finishes to ~32"x 40". 

Hopefully this colorful quilt will bring joy to its new owner.  :)


Saturday, June 7, 2014

A Little Quilt from Grandma

As a child, I loved playing with dolls.  Grandma knew that.  When she had some fabric leftover from making aprons, she made doll quilts for me and my sisters.  This little quilt was used to tuck in some of my favorite dolls back then.      

I have not outgrown my love of dolls.  I have kept some of my favorites from childhood and have built up quite a collection of bears.  My doll quilt is still cherished and every so often I'll bring it out and display it with some of the bears and dolls in my collection.

This quilt was the inspiration for "Granny Stars"--one of the patterns in my Little Dolly's Too pattern packet. You can find the pattern on my website: http://carolsscrapquilts.webs.com. 

Wonder if this bear has invited others to the picnic???   

Wednesday, May 28, 2014

Another "Oldie"

Last week was a crazy busy week so I did not have a chance to post.  I spent 3 days at the NQA show in Columbus.  Once again I was wowed by the beauty and creativity displayed in the quilts there.  There were many quilts with detailed applique; many with amazing machine quilting; and as usual, the ribbon winners were stunning.  I admire the determination it takes to see such a project through to the end!
The Blazing Star quilt that my grandma made for my parents took determination, too!  That is one design that must be pieced carefully so that it lies flat, especially in the center. 
This quilt was long-forgotten until I found it at the bottom of Mom's cedar chest when I was preparing her house for sale.  Like the 2 quilts I showed in previous blogs, it is thin and worn--signs that it was used often and well-loved. 
Grandma made these quilts in the late 40's and into the 50's.  I'm intrigued by the fact that the colors in these quilts are 30's colors--pastels.  Makes me wonder just how far back Grandma's scrap bag went!!!  I will most likely never know.

Wednesday, April 23, 2014

Use Your Scraps, Part 7

In previous blog posts I have given you suggestions for strips, squares and triangles.  If you have sorted your scraps, you have probably found fabric chunks that do not fit into any of those categories, and you might be wondering what to do with those.
An easy solution is to create your own fabric from them by sewing them together.  You can combine the colors randomly or sort so that you are only using neutrals, only greens, only reds, etc.  The most important "rule" when creating your scrappy fabric is to make sure you are joining STRAIGHT edges.  This will insure that your finished fabric will lie nice and flat.  So, once the fabric chunks have been pressed, trim a straight edge on each scrap and pair up the scraps according to the length of the straight edge.  Stitch with a 1/4" seam and press the seam allowance to one side.  Trim a straight edge on this pair of scraps and add another scrap to it.  Continue to add pieces in this way until your new fabric is large enough to cut your desired shape from it.
Leftover pieced units from previous quilt projects can be worked into this fabric in the same way as other fabric scraps.  I like to sort my scraps into "large" and "small" before beginning to create my fabric.  I piece the small scraps together when I know that I will be making small blocks.  I piece the larger scraps together when I know that I will be making large blocks. 
For more detailed instructions on making scrappy pieced fabric, check the "How-To" tab on my website:  http://carolsscrapquilts.webs.com.  
Have fun creating your own unique fabric!   

Thursday, April 10, 2014

Use Your Scraps, Part 6


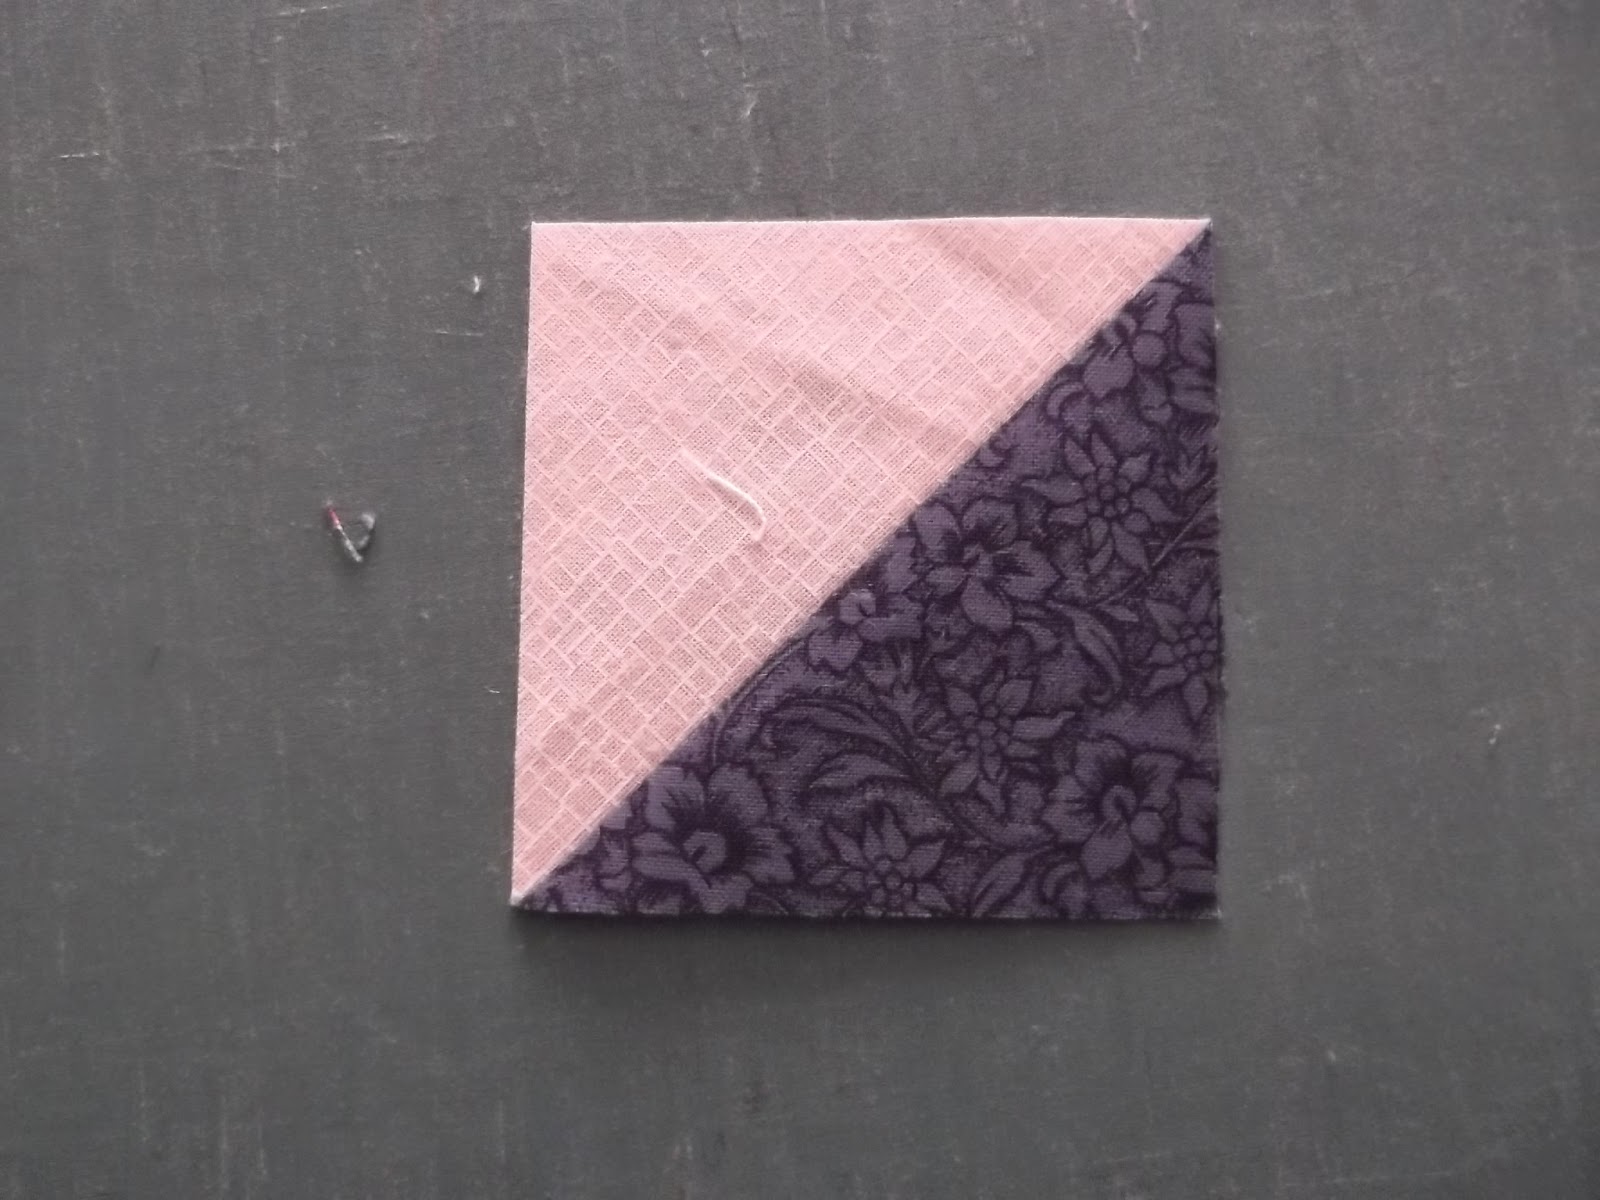
Many quilt projects result in half-square triangles being left behind.  Once you have a collection of them, turn them into squares.


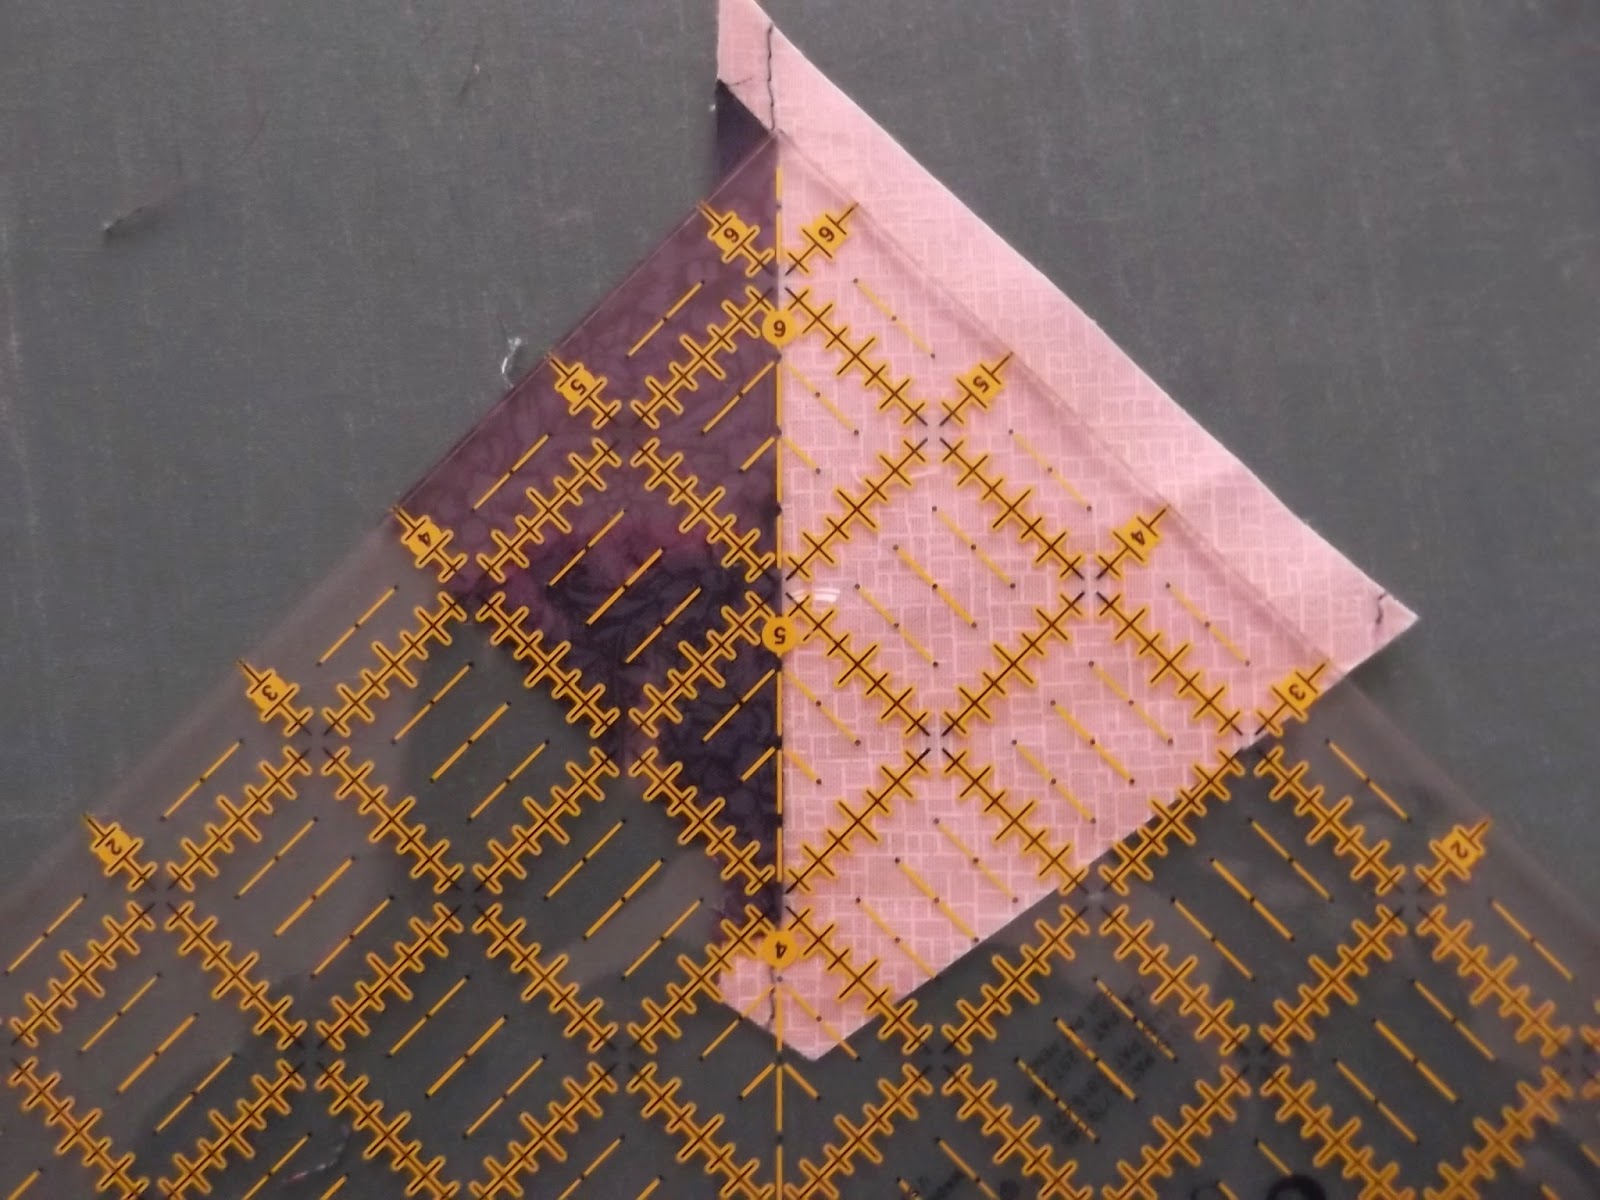
Cut a strip of background fabric that is wider than your largest triangle is tall.  Place the half square triangles along the edge of the strip--raw edges of long side of the triangle matching to the raw edge of the strip.  Stitch them in place.


Cut the triangles apart, leaving extra fabric around each one.  Press the seam toward the dark fabric.  Using a small square ruler, align the seam with the 45 degree line on the ruler to square up each triangle square. 


Once they are all squared up, the squares can be trimmed down to the size needed for your project.  Be careful of the edges of the background fabric.  They are now on the bias, so handle the finished squares carefully.

(To end up with edges that are not on the bias, cut squares of background fabric slightly larger than the short side of your half square triangle.  On the wrong side of the fabric, draw the diagonal of the square.  Match the long side of the half-square triangle to the drawn line.  Stitch the triangle in place, using the drawn line as a guide for your 1/4" seam.  Add another triangle to the other half of the square.  Cut apart on the drawn line.  Press seam allowance toward the dark and square up as above.)
Great scrappy quilts can be made from these new 1/2 square triangles--pinwheels are fun.  Be creative and play with the design possibilities. 

Wednesday, April 2, 2014

Use Your Scraps, Part 5

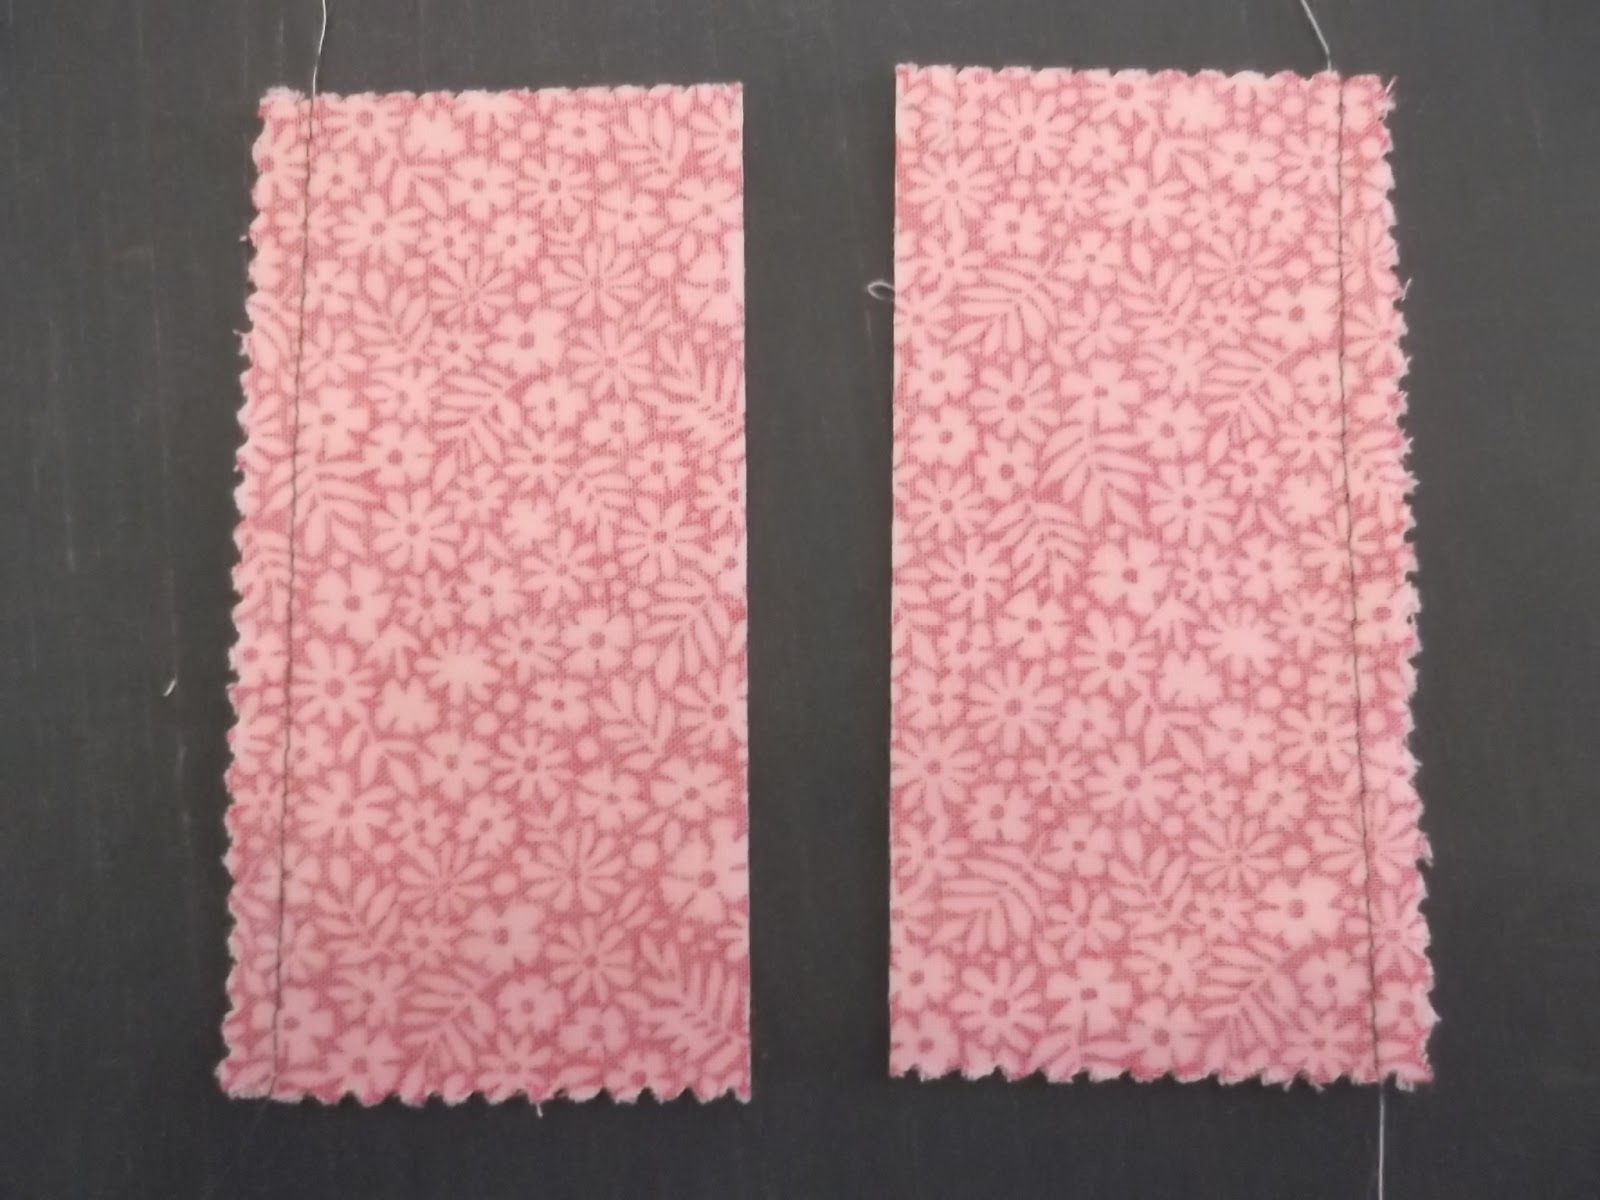
Here's another idea for using your charm squares--a fun way to make 4-patch squares.  Right sides together, pair up a print charm square with a solid square of the same size.  Using a 1/4" seam allowance, stitch the squares together on opposite sides.  Then cut the sewn squares apart through the center (the cut will be parallel to the stitched edges). 

Press the seam allowances toward the print fabric.  Right sides together, place one pressed square on top of the other, with the print rectangle on top of the plain rectangle below and the plain rectangle on top of the print rectangle below.  The center seams should butt nicely to each other.  Pin in place.  Using a 1/4" seam allowance, stitch along the opposite outer edges--this stitching will be perpendicular to the center seams.

Again, cut the squares apart through the center--parallel to the seams you just sewed.  Open out and press.  You now have two 4-patch squares!  Square up as necessary.

I think this technique is perfect for those charm squares with pinked edges-- which I find so hard to work with!  Because of the way these 4-patch blocks are constructed, those pinked edges disappear!
Try this...you will like it!  :)


Wednesday, March 19, 2014

Using Your Scraps, Part 3

More ideas for using your collection of fabric strips...Sew the strips to foundation blocks. 
From any thin fabric you have in your stash, cut squares--anywhere from 6 1/2" to 10 1/2" square.  (The larger your square, the longer the strips will need to be to cover the square, so determine the size of your foundation square by the lengths of the strips in your collection.  Another thing to think about--the smaller your foundation square, the more of them you will need to make a large quilt top.)
You will cover the foundation square with the fabric strips, using the sew and flip technique, then you will trim the outer edges back to the size of your foundation square. 
Begin in the center of your square.  Lay one strip, right side up, across the diameter (or near diameter) of the square.  The ends of the strip should hang over the edges of the square.  The next strip you choose can be a bit shorter than the first.  Place it on top of the first strip, RIGHT SIDES TOGETHER, matching the long edge on the right-hand side.  Stitch along this edge, using a 1/4" seam allowance.  Open out the stitched strip and finger press the seam.  Choose another strip, a bit shorter than the one it is next to (but be sure that it covers the foundation square) and repeat the process.  Continue choosing and sewing strips until the entire right-hand side of the foundation square is covered.  Rotate the square and do the same to cover the other side of the foundation square. 


 At this point, it will no longer look square.  Turn the entire piece over so that your foundation square is visible.  Using your square ruler and rotary cutter, trim the block to the original size of your foundation square. (Your foundation square may have shrunk with the stitching.  If so, do not follow the edges of the foundation square, but trim the block to the size it was to begin with.)
You can choose the color of the strips at random for a true scrappy look.  Or, you can use the same color strip down the center of each block and put light strips on one side and dark strips on the other.  Play with the placement of the blocks when you are ready to set them together.  Alternating the direction of the strips creates interesting designs.  Use my pictures for inspiration and have fun!!! 


Friday, March 14, 2014

A Bump in the Road

Well, so much for resolutions!  I'm already a couple of days late in blogging this week, and this post will NOT be about scrap quilts.  I am playing nursemaid to a husband who had surgery on Tuesday to repair a broken ankle.  I had good intentions of continuing with ideas for using fabric strips, but my brain is not into it right now and my time is spent doing other things.  Each day is getting a little easier, though, so next week I'll be back with some strip quilt ideas, complete with pictures.  Stay tuned!  (PS:  so glad that I'm a quilter!  Helps to keep my sanity!!!) :)

Wednesday, February 26, 2014

Use Your Scraps, part 1

The whole point of sorting your scraps and leftovers is NOT storing them.  The real point of sorting is knowing what you have so you can begin to use your scraps and stash.  :)
Keep your eyes open for patterns that use the stash items you have.  In the meantime, pull out some strips, small squares or half-square triangles.  Press them so they are flat and ready to work with.  Keep a box of them next to your sewing machine and use pairs of them** as "run-offs" while you are piecing other projects. (**Pair up your squares or triangles by light/dark.  Strips can be paired up according to length; choose colors at random.)  Before you know it, you will have enough of these units to use in a quilt top!

Thursday, July 4, 2013

Back to the "Dad" quilts

Wow, a whole month has gone by since I last posted something here.  Guess it has been another busy month!

The "Dad" quilts are slowly getting completed.  I'm working on the bindings now.  Because I decided that all of them should be made from 25 9" squares, I had to get creative with the last ones to be pieced.  Dad was a little guy, and it was hard to cut enough 9" squares from his shirts that were on the smaller side.

I turned to my "scrappy piecing" and cut pieces to fit into the armhole areas or the sides/bottoms of sleeves.  I now had pieces big enough to cut the squares that I needed. I also made some 4-patch squares from smaller shirt pieces and worked those into the quilt tops. 

For the quilt backs, I bought light-weight denim that is ~56" wide.  The extra width is just enough to use for the binding.  The quilts are tied with size 5 pearl cotton and random buttons from Dad's shirts are tied into the knots at the centers of the squares. 

The quilts are turning out soft and cuddly...hopefully a reminder to the recipients of the kind of guy Dad was--soft-spoken, accepting and encouraging.  He's been gone 2 years and he is still very much missed. 


Thursday, April 4, 2013

Costa Rica: First Project

The first project that was taught to the ladies in Costa Rica was the pillowcase dresses (little dresses for Africa).  The pattern was taken from the Nancy's Notions website.  Perhaps you already know about these dresses--just made from a "tube" of fabric.  Armholes are cut and hemmed (or encased in bias),  and casings are made at the top edges of the front and back.  Elastic is run through the casings, the bottom edge is hemmed, and ribbon ties are stitched to the shoulders.  Quick and cute!
Making those put me in the mood to sew for my granddaughters when I got home.  I've already made a sundress for the Oklahoma granddaughter who just turned 4 and a top and shorts for the almost-3-year-old.  Another dress is waiting to be cut out and stitched.  I'd forgotten how much fun it is to sew clothing for the little ones!  I'm glad that the trip to Costa Rica reminded me!

Tuesday, January 29, 2013

Assignments Part 2

One of my teaching assignments for Costa Rica is reverse applique. Since Costa Rica is home to over 100 species of butterflies, I would like the learning project to be an appliqued butterfly block, which I can then turn into a pillow cover (another of my teaching assignments).
I spent the past couple of weeks looking through my quilting books for just the right butterfly pattern.  Nothing seemed to be what I was looking for, and I thought I would have to design something myself.  That's when I looked out my kitchen window and saw my shepherd's hook.  As you can see from the picture (even though it is slightly blurry), the design was right under my nose the whole time.  Quilting designs truly are everywhere--we simply have to keep our eyes open!  

Wednesday, October 10, 2012

Little Pink Houses Latest Update

The following is what I received from my contact at Henry Ford Macomb Hospital:
"over $450.00 was raised.  Mission accomplished!!!
Many thanks to you and the block contributors!
You are helping to make more birthdays!!!!"
 
Nice to know that we are helping to make a difference! 
 

Monday, October 8, 2012

Just Beautiful!

The other day I heard a radio DJ comment on the colors of the trees here in the Great Lakes area.  He said that he thinks they are prettier this year than they've been in a long time. 
The trees are starting to turn here in my area and I would agree with him.  I'll be driving along and come upon a group of trees whose color just takes my breath away!  Wish I could capture these images on film so I could remember them forever. 
Looking for  color ideas for your next quilt?  Just take a drive (and remember your camera). 

Tuesday, October 2, 2012

Pink Houses Project Update

A week ago I said good-bye to the last of my Little Pink Houses quilts.  It was a bit sad to do so because that project had been part of my life for almost a year.  But it  also made me happy because I knew that the project was done for a good cause. 
The quilts were delivered in time to be part of another fundraiser at Henry Ford Macomb Hospital.  I haven't yet heard how much $$ they helped raise for the low cost/no cost mammogram program at the hospital.  Hopefully the quilts got the intended message across and sold well. 
This being Breast Cancer Awareness month, are you up to date on your mammograms?  Hope so!  Cure rate is great when caught early! 

Wednesday, May 2, 2012

Change of Plans

After looking at the calendar, seeing what the coming weeks are bringing, and realizing that I have to have some "Little Pink Houses" quilts to the hospital by May 25th, I changed my plans. I put aside HAZY for now and pulled out CLEAR SKIES. Quilting 9 blocks seemed much more manageable than quilting 12 blocks.
I got right to work marking the quilt top, then layering it up. I've been working on it steadily (and have a sore finger for proof!) and am just about finished with the hand quilting. Just have to quilt along the border on both sides.
CHANCE OF SHOWERS now has the binding sewn on by machine. I just have to do the hand stitching to finish it off. And I'm in the process of making labels for both quilts.
I feel confident that these two quilts will be ready on time! Yay!

Thursday, April 26, 2012

I'm back!

It has been a very long time since I wrote something for my blog. I've been busy--stitching, traveling, writing, speaking. I guess I am thoroughly back to being myself--immersed in everything quilt-related. That's a good thing! :)

Last weekend was my annual quilt camp retreat. I did a bit of machine work, but the bulk of my time was spent quilting the first of the "Little Pink Houses" quilts. The first one I chose to work on was "Chance of Showers". I just have to quilt up the sides along the borders, and then it is ready for binding. The next one I'll tackle is "Hazy." I'm hoping both will be finished before Memorial Day so that they can be auctioned off at a Survivor's Event in mid-June. So far, everyone who has seen the quilts and heard their story has been moved. I hope that they will raise lots of $$ for the low-cost/no-cost mammogram program that my local hospital is starting.

To see all the quilts and close-ups of the blocks, go to:http://littlepinkhousesquilts.shutterfly.com/
I'll record my progress and the success of the quilts here in my blog.

Thursday, February 2, 2012

Good Suggestions

I'm still working on my sewing room, doing a little each day. It is getting less and less intimidating, which is a good thing!
When we moved to this house 14 years ago, many of my sewing things were left in boxes and put on shelves in the basement. Little by little over the years, those things have made their way into my sewing room, leaving empty space on the shelves.
One quilting friend suggested that the things I am not using right now, but don't want to get rid of, should go into plastic storage tubs and be put on the basement shelves. Why didn't I think of that?
All my bear-making supplies will (hopefully) fit into an 18-gallon tote so they can be stored on a basement shelf. That will free up lots of space in the closet in my sewing room! Hmm...what else can I put away in a storage tub in the basement?

Sunday, January 29, 2012

Oh My!

As you know, I've been working my way around my sewing room, sorting and organizing. I never realized how long this would take! My head is swimming...it seems that everywhere I look I find UFOs. Add to that all the "wannados" I come across. I'm thinking that I need to stop organizing right now and get busy sewing! That's much more fun, anyway! :)

Thursday, January 26, 2012

Papers, Papers, Papers

Several days have been spent sorting papers--copies of quilt patterns from magazines, books or the internet, quilting articles saved from newspapers or magazines, etc. Over the past few years, these have just been stacked in a box. I figured it was time to put them away in the file cabinet that sits in the corner of my sewing room.
The file cabinet has 4 drawers. Each drawer was already pretty full because I've been saving files of quilting articles and patterns for YEARS. Plus, anything that didn't seem to have a place got stashed away in one of the file drawers. The drawers are now a bit more organized and the sorted papers have been filed.
One day I should just concentrate on that file cabinet. Leafing through the files, I realized that some of them are no longer relevant. If those were removed, there would be more room for future pictures and patterns. :)