Showing posts with label scrap quilts. Show all posts

Monday, February 19, 2024

Brown Goose

A year or so ago, in with my collection of fabric scraps and projects that had been started, I found a box of small triangle cut-aways---in pairs!  LOTS of them!!! 


I cannot recall where they came from, but I had obviously looked at working with them sometime in the past.  In with them was a pieced block--"Brown Goose".  Plus, being somewhat of an amateur poet, in the box was a poem** that I had written about Brown Goose.  It was time to continue this project.


I set the box of cut aways next to my sewing machine and used the pairs as my thread savers ("leaders and enders") as I was sewing other projects.  As the pairs were sewn, they were set aside.  


It took me several months to sew all of the pairs.  Once all were pieced, they were pressed and trimmed to 1 3/4" square.  


Sixteen squares were needed for one Brown Goose block.  I ended up with enough squares to make 14 blocks!  The blocks finished 5" square. 

I re-read and tweaked my poem to ponder how to use the 14 blocks. 

**Little Brown Goose was waddling along,

   Enjoying the day,

  Singing a song.

Out jumped her buddy, Bright Green Frog.

  They stopped to chat

  On a nearby log.

Miss Blue Bird was flying by.

  When she saw her friends,

  She stopped to say “Hi”.

All their noise woke Furry Gray Mouse.

  She peered out, saying

 “Who's on my house?”

Seeing her pals, she cried “It's you three!”

 “Stay right there.

  I'll put on some tea!”

She brought out the tea, a cookie plate too.

  They talked and they laughed

  Like good friends do.

Chatting with friends over cookies and tea

  Is the best kind of day!

  Don't you agree?

I looked through several pattern books for blocks to represent the characters and other elements in the poem.  I even found a block called "Tea for Four"!  The challenge, then, was to draft them to finish 5".   

Thank goodness for a stash of scraps!  Bits of the brown fabric were needed to make the fourth "T" in the "Tea for Four" block.  I just happened to find some squares of the brown fabric there!  


Sashing and cornerstones completed this small quilt.  It was just a fun little project (that took over a year to complete!).


Sunday, November 19, 2023

From the Heart

The prayer quilt ministry at my church was begun last Sunday with 3 quilts.  The congregation was very receptive to this new ministry and willingly participated in the tying of them and praying over them.  After the service, I received requests for prayer quilts for other congregation members.  So I am busy making more. 

I have several fat quarter packs that have been waiting to be made into quilts so I chose to use the Yellow Brick Road pattern.  The pattern's 4 block x 5 block quilt requires 6 fat quarters--perfect, for that's what my fat quarter packs contain!

The pattern is quite simple...one is directed to cut the fat quarters into strips of 2 different sizes.  These strips are then sewn together "in a variety of combinations", cut apart and then sewn again "in a variety of combinations".  With only 6 fabrics, there is a limit to the "variety of combinations" one can make.  :)

When the blocks are all created (3 different designs), one is told to "arrange the blocks in a random order, turning the blocks as needed so that color placement is pleasing and seams are offset (if possible)."  The main thing I try to accomplish when laying out the blocks is to avoid having the same fabric next to itself--not always possible!  And after trying several different layouts with this first group of blocks, I found that it was impossible to have all of the seams offset, so I stopped worrying about that, too!  

Many of my quilting friends make quilts for charity.  I've heard some of them comment that one doesn't really have to be so fussy with charity quilts--the recipients will love them no matter the size, design, etc.  I, for one, certainly hope so.  And I hope that they can feel that these quilts are made from the ❤.  :) 


Thursday, October 19, 2023

Windmills to the Rescue

What fun to find these blocks and coordinated fabrics among all of the leftovers from other quilters that I collected this summer. 

There were 14 of the strip-pieced blocks which measured approximately 6" x 6".  I challenged myself to use these blocks and coordinated fabrics to make a lap quilt that was at least 36" square.  


The blocks were not all exactly the same width, but were 6" long.  Because of this, I cut the blocks in half across the strips.  White rectangles, measuring 4" x 6" were pieced to each of the half blocks.  The resulting blocks were trimmed so that there was 2 1/2" of strip piecing remaining--I now had 6" blocks.  

Four of these, set together, created a Windmill block.  This design seemed to camouflage the irregularity of the "leftover" blocks.


Once I had my design figured out for these leftovers, I was excited to keep going.  I needed to make more blocks for a 9-block lap quilt.  The strips in the original blocks measured ~ 1 5/8" wide.  So strips were cut from the coordinating fabric, then pieced in the same order as the original blocks.  The new strip-pieced sections were cut in half and pieced to white rectangles, then trimmed into the units necessary for the Windmill blocks.  

Sashings  and cornerstones were cut from the remaining coordinating fabric (2 1/2" wide).  The quilt top went together very quickly!


When layered, tied and bound, this little quilt will be the first one in our church's new prayer quilt ministry. 
 

Sunday, September 17, 2023

Road Construction

Some chunks and strips of fabrics featuring roads, road signs, and vehicles were in a bag of scraps that I brought home from a retreat that I attended a year ago.  These were leftovers from a fellow quilter who was making a quilt for her grandson.


Since a number of the pieces were fairly long strips, I planned that this lap quilt would be made from horizontal "stripes".  I began by piecing together chunks or adding chunks to strips to make stripes approaching the width needed for a lap quilt.  In my stash, I found coordinating fabrics from which I cut more long strips.  Now I needed to map out the details of how all of these stripes would go together.

At one of this year's summer retreats, I took advantage of a large work space to lay out the stripes.  (While doing so, a retreat friend contributed some "truck" fabric leftovers to add to my quilt!)  I was able to determine the best order of the stripes, then cut them all to the size of the shortest one. 


When pieced together, the quilt top measured ~31" x 34".  I wanted to add a 3" border to make it bigger.  I did not have enough of any of the fabrics that I had used to construct the basic quilt top, so had to go shopping. 


I purchased a gray fabric that blended with the gray in the fabrics of the quilt top.  But when I laid that out next to the quilt top, it just seemed kind of "blah".  I went "shopping" in my stash and found a black fabric with a subtle gray print.  This did a better job of framing the quilt top. 


Corner squares were cut from some of the leftover vehicle fabrics. 


Construction complete with no major road blocks!  When it is tied up and bound, this lap quilt will be ready to be used and enjoyed.

Monday, July 17, 2023

Sailing Away

Lap quilts are the perfect size with which to experiment with leftovers...both mine and those that I "inherit" from others.  

I was given 15 squares, plus several scraps, of a colorful "boat" print. The squares measured 6".

Since 15 was an odd number to work with, I was able to piece an additional 6" square from the scraps (just like our quilting fore-mothers did when they didn't have a big enough piece for their design!) . Now I would be able to set the blocks 4 x 4.


Something had to be done to the 6" squares to make them GROW into a decent size lap quilt.

Using the colors found in the print, I searched my stash to see what fabrics I could use to border out the squares, making them bigger.  I found a dark turquoise "blender" fabric that would be perfect!  However, there wasn't enough of that fabric to add borders to all sides of each square, so the dark turquoise became the top and bottom borders of each square.  A solid red fabric was used to border the sides, with solid white used for the corners of the blocks. Because all of these border strips were cut 2", the blocks now finished at 8 1/2".


To help the quilt grow a bit more, the blocks were set with solid turquoise sashing, cut 2" wide.  To mimic the smoke coming out of several of the boats in the print, a grey "blender" fabric was used for the cornerstones. :)  The finished lap quilt top measures ~38" square.  

After the quilt is tied, it will be bound with the solid turquoise fabric, and will be ready to sail away to a new home.  :)


Saturday, June 17, 2023

Hurrah for Red, White and Blue!

Every once in a while I like to work with my stash of red, white and blue fabrics--especially since most of my lap quilts are donated to the local VA hospital.  

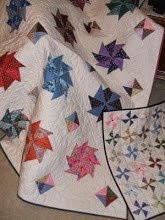
A pack of red/white/blue charm squares was saying "use me".  One fast and easy way to use charm squares is to make half square triangle squares which then become pinwheel blocks.  I decided that my design would alternate red pinwheels with blue ones. For 16 pinwheel blocks I needed 32 light charm squares and 32 dark ones (16 red; 16 blue).  Since there weren't that many of each type in the charm pack, other 5" squares were cut from my stash fabrics.  

The sixteen pinwheel blocks, when set together, measured 32" square, finished.  To make the lap quilt bigger, a 4" border was added. 


My stash also included many red/white/blue scraps and leftover blocks/block parts.  These were scrappy pieced together for a second lap quilt.  The chunks were pieced so that, when sewn together, I could cut 8 1/2" squares.  I planned to use 2" (finished) sashing between these blocks in order to make the lap quilt to finish 38"square.  I also thought that forming stars at the cornerstones would be interesting!  But what colors to use for both?  

There was not much, if any, gold in the fabrics that make up the blocks, so I decided on gold sashing.  With that color sashing, I chose white for the cornerstone stars.  But the more I studied the blocks as I was arranging them, I noticed white fabrics at many of the block corners.  White stars would not really show up at those intersections; plus many stars would make the quilt much too busy.  One star in the center seems perfect! 


While working on this lap quilt, I realized that it takes much more time to create scrappy pieced blocks than it does to make pinwheels!!!  :)

Both lap quilts will be tied.  I like to use 6 strands of embroidery floss for tying...for these I will use 2 strands white, 2 strands red and 2 strands blue.  Patriotic all the way!


Wednesday, May 17, 2023

Buried Treasure--Strip Sets

It's a good idea to sort one's sewing room every so often.  It's amazing what can be found stashed away!

These strip sets were buried in a box in my sewing room closet.  They were leftovers from a quilt that my daughter made many years ago.


It was definitely time to do something with them.  They would be perfect for a lap quilt.  

The strip sets measured 6 1/2" long.  I decided to put them inside cream-colored squares.

The cream squares were cut 4 1/4", then cut in half diagonally.  The center of the long edge of the half square triangle was marked, as was the center of the strip set.  The center marks were matched up to stitch the strips inside the squares.  Once both sides were stitched, the block was pressed and squared up to 4 1/4".

I had seven sets of 6 blocks of the same print combination.  But not all of the strip sets were the same width.  I experimented a bit with the best way to set the blocks together--even tried a pinwheel design.  In the end, to my eye, diagonal rows looked the best. 

The blocks were set 6 across and 7 down.  With six of each strip-pair block, the order of the rows worked out just right!  :)

More buried treasure was found in my closet--enough fabric in my stash for the borders.  The gold fabric was cut 2" wide; the green fabric was cut 4 1/2" wide. 


The finished size of the quilt top is ~34" x 38".   It will be a cozy little lap quilt!


Monday, April 17, 2023

Not Quite Log Cabin

 As you may know by now, I am always on the lookout for quilt designs that will work to make lap quilts and use up my fabric scraps.

At a retreat that I attended last year, there was a basket of $1 patterns.  Looking through it, I found "Garden Window" by Bits 'n Pieces.  The description said "a pieced quilt with applique flowers--make it with quilters quarters".  The background on which the flowers were placed appeared to be a kind of Log Cabin design.

One of my scrap bins contained a stack of "somewhat" coordinated larger pieces of fabric, several of which were wide strips.  These fabrics were perfect for this pattern!

The instructions said to make strip sets of two different sizes and cut those into chunks for the block centers.  The centers were then surrounded by four strips, all cut to the same size.

As I was making the various block parts, I made sure to mix up the placement of the fabrics.  Piecing the blocks was quick and fun.  

When the blocks were set together, no matter which way they were turned, there were no seams to match up!  Easy!!  


The "somewhat" coordinated fabrics are repeated enough so that the resulting quilt top is scrappy, but not too busy (at least to my eye).  Twenty blocks, set 4 x 5, finishes to ~32"x 40". 

Hopefully this colorful quilt will bring joy to its new owner.  :)


Monday, January 2, 2023

On Safari in Kenya

My trip to Kenya was called "The Ultimate Safari".  It seemed that every day was some kind of adventure with animals!

On the first day we visited the Giraffe Center, outside Nairobi, where the Rothschild giraffe species is being conserved.  We were able to get up close and personal with these beautiful creatures and feed them special treats. 


On the second day we headed north to the Ol Pejeta Conservancy where we spent the next 3 days.  We stayed in tents and went on safari drives 2 times each day. 

We had to stay in our jeep during the safari drives, but our guide took us as close to the animals as he could. ( And the zoom feature on my camera helped a bit, too!)


Each day we saw a variety of birds, on the drives and also around the campground.  (Deer and baboons roamed the campground, too! )

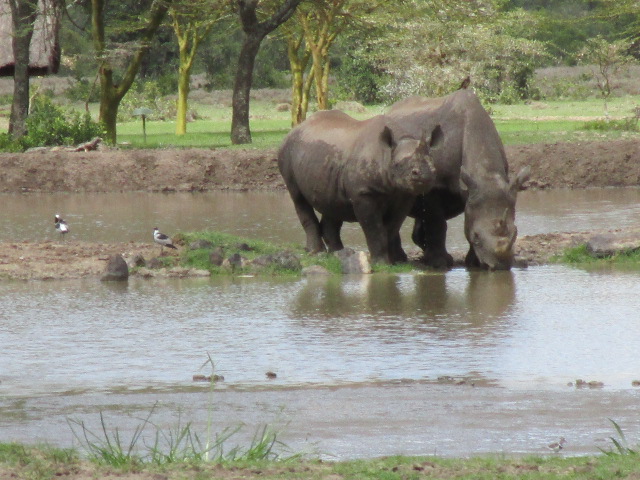
One morning we were able to pet a black rhino...Barak is 27 years old and blind.  He's in his own protected environment and doesn't mind the attention.  

Back to Nairobi, a visit to the David Sheldrick Elephant Orphanage.  Endangered baby elephants are rescued from the wild and brought back to health until they are able to be on their own again.  


And a day trip from Nairobi took us to Lake Naivasha.  We boated near the hippos then walked the grounds to be close to giraffes (Yes, giraffes are my favorites!!!)  :)


This trip had been rescheduled 3 times.  It was definitely worth waiting for, and was truly an amazing adventure!


Wednesday, November 23, 2022

Cutter Quilts

I have been interested in vintage quilts for a very long time.  Along with the vintage blocks that I have been blogging about, my collection includes vintage quilt tops and vintage quilts.  Some are in good shape; others had outlived their usefulness as quilts, but were purchased for a purpose.  Thirty years ago I got caught up in the trend of using old, worn out vintage quilts for clothing, bears, dolls, and other decorative items. That is when I first heard the term "cutter quilts". 

Cutter quilts have damaged areas--holes, spots or worn places--but have areas that are still in good enough condition to use for smaller items.  As with other aspects of quilting, cutter quilts are once again being talked about. All kinds of ideas for using them can be found online.  Just search for "cutter quilt crafts". 

Recently I pulled out some of my cutter quilt scraps to make Christmas ornaments.  


All were made from simple shapes--"three tiered" snowmen;  angel heads on hearts; stockings.

The snowmen are a single layer of the quilt; the edges finished with the buttonhole stitch all around.  After the faces were embroidered, the shapes were stiffened with a 50/50 mixture of Elmer's glue and water.  Once dry, the scarves were tied around their necks and held in place by stitching on a button.  

Both the hearts and stocking are lined--placed RST on the lining fabric; stitched around leaving an opening for turning.  The angel heads are lined circles, hot-glued in place.  Raffia creates their hair.  A bow is tied under their chins; a small charm is stitched right under the bow knot.

The stocking is topped with vintage crochet edging which was basted in place before stitching the stocking piece to the lining.  A bow is tacked to the upper right corner.  

Because I did not know the makers of the cutter quilts that I bought, it was not difficult to cut them up.  These small vintage quilt pieces have found new life in items that will (hopefully) be cherished!


Wednesday, August 17, 2022

In Mourning

Those who study fabrics in quilts made in the late 1800s recognize black and white fabrics as "mourning prints".  Perhaps the name came from the Victorian Era, when Queen Victoria wore black to mourn the passing of her husband, Albert?  In Clues in the Calico, Barbara Brackman indicates that these cottons, with fine black lines or tiny figures on a white ground, making them read as gray, were very popular with quilters in the 1890-1925 era.  Around that time, mourning print cottons were advertised for sale in the Sears and Montgomery Ward catalogs and could be purchased for very little. 

Here's a photo of such fabric for sale on Etsy: 

I am currently working with vintage blocks that were made from mourning print cottons. 

I have only 4 vintage blocks.  Using reproduction fabrics from my stash,  I am making more blocks to add to the vintage ones.  This 9-patch design is simple enough to recreate.  Because the squares in the vintage blocks measure 3.5" finished,  I am cutting the center square 4" and those for the half-square triangle blocks, 4.5". 
 

Curious to know the name of this pattern, I searched through my quilt books and online.  The closest I could come to a name was either "Cats Cradle" or "Old Maid's Puzzle".  These blocks are a variation of those, however, with half-square triangle blocks at all four corners.  

I discovered more mourning print fabric as I was searching through my bag of vintage fabric scraps.  I found these (obviously) 60° diamonds all tacked together.

As "wonky" as these are, I cannot imagine a quilter piecing them together and having them lie flat!  

In one of my quilt pattern books I found the perfect size 60° diamond and made a plastic template.  This will be traced on the wrong side of each wonky diamond so that I can hand piece them. Then what???  I am not yet sure.  I will ponder this as I am piecing them.


I titled this blog post "In Mourning", not just because of the particular vintage pieces that I am now working with.  I AM in mourning!  I recently lost a special quilting friend to cancer...much too soon!  Michelle was so creative and inspirational to many.  She is already missed!    If there is a quilters' room in heaven, I know that she will be there!